
Deploy containerized Business Intelligence web application using Amazon ECS
UPDATE: This article is based on an older version of Atoti. Check out the latest Atoti documentation for the most updated information.
Dockerizing a project makes deployment easy. Considering the popularity of Docker and cloud, we are going to explore how we can deploy a business intelligence tool on Amazon Web Services (AWS) with the Atoti Docker image. Why Atoti?
Because Atoti is a powerful Python library that is capable of performing big data analytics. In addition, it comes with a BI web application.
Objective
The goal of this article is to give access to the Atoti tutorial development platform from the cloud for anyone to try it out. In such a case, we don’t need persistence and we’ll use the Atoti Docker image so that the environment comes ready to be used. If you are interested in giving access to the Atoti development platform to run projects different from the tutorial, follow The Ultimate deployment guide for Atoti on AWS with Amazon EC2.
With a step-by-step guide on how to deploy the Atoti Docker image on the cloud using Amazon ECS, let’s see how you and your peers can have a common platform via AWS to perform the following:
- Go through the Atoti tutorial

- Create your own notebooks to perform data analysis
- Build and share dashboards from the same BI instance
This eliminates the need for everyone to maintain a Python environment on their own machines.
Prerequisites
We have created a free account with the AWS free tier for this article.
Atoti Docker on AWS
There are a couple of ways to deploy docker images on AWS, e.g. using the AWS Elastic Beanstalk or Amazon Lightsail. We are going to look at how we can quickly deploy our Atoti image on AWS using the Amazon Elastic Container Service (ECS).
Deploying Atoti docker image on Amazon ECS
We can easily deploy the docker image on AWS using Amazon ECS using the 4 guided steps from “Get Started”. You can also create each step manually from the menu under Amazon ECS.
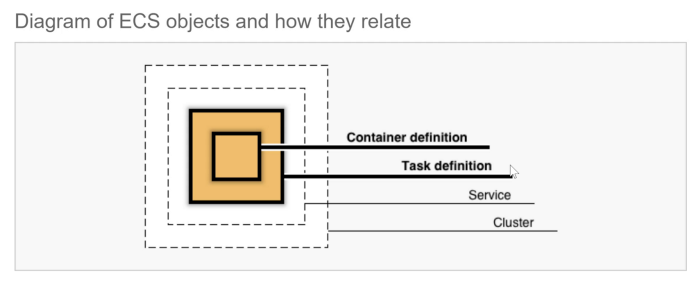
Container definition
We will be using the custom image to configure our container.
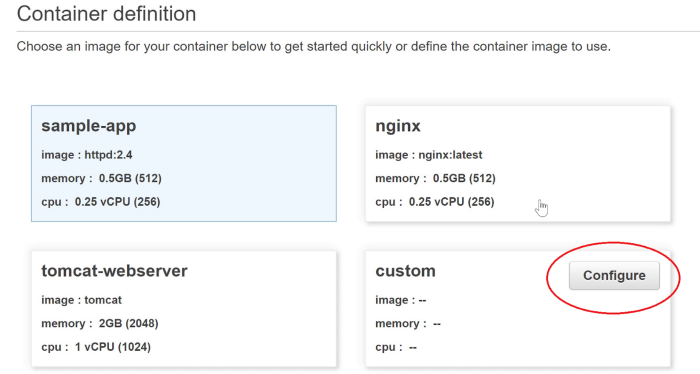
We have the option to use:
- a container image stored in ECR
- the Atoti image from Docker Hub.
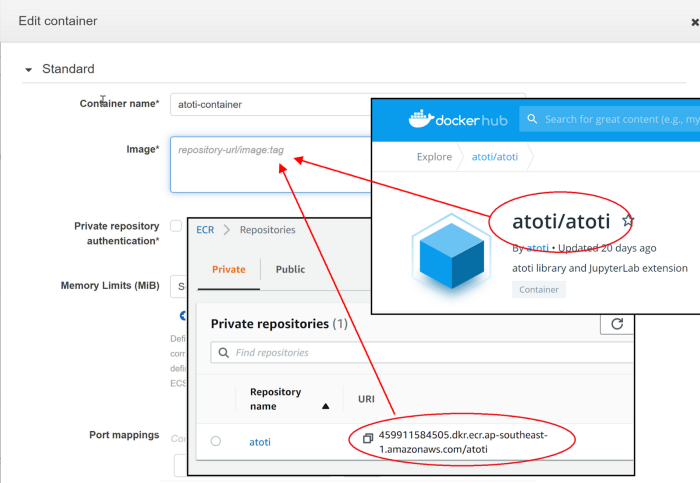
Set 8888 for port mappings.
This would be sufficient for the container definition. Save the configuration and proceed with the Task definition configuration.
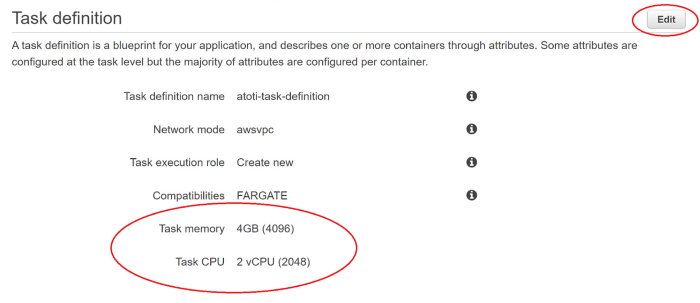
Task definition
As we will be running aggregations with Atoti on JupyterLab, we need to ensure we have sufficient resources. Other than giving the task definition a meaningful name, edit the CPU and memory to the desired values. Below we will use 4GB of RAM and 2 CPU. Feel free to adjust the allocation according to your usage.
Service
We are going to create an application load balancer. The application load balancer helps to regulate the traffic and also allows the container to use dynamic host port mapping.
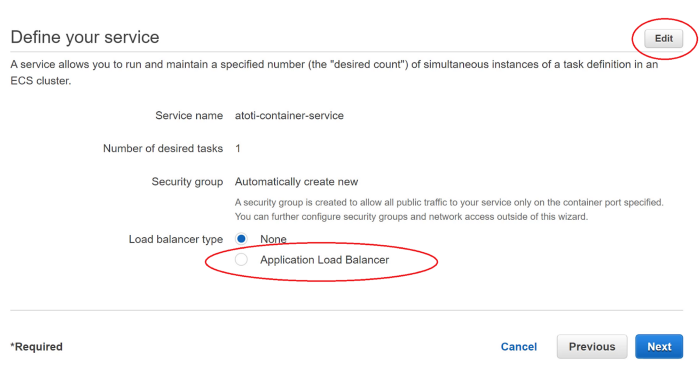
We could click Edit to modify the other parameters of the service configurations. Note that a target group will be automatically created with the load balancer.
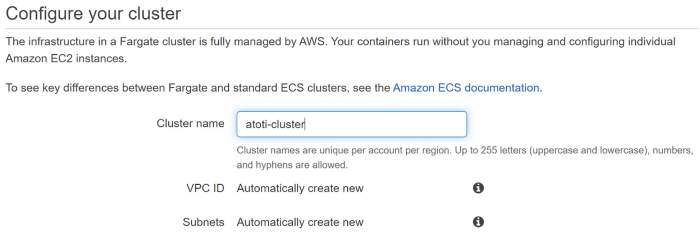
Cluster
Simply give the cluster a name and AWS will take care of all the rest. We are now good to go with the creation!
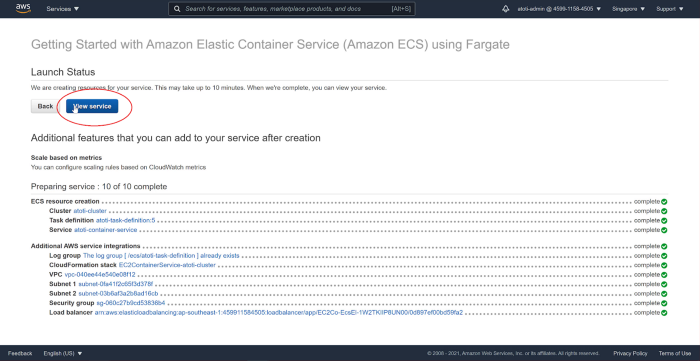
Viewing the services
The Launch Status page shows the resources that were created for this container. Click on View service to see the details.
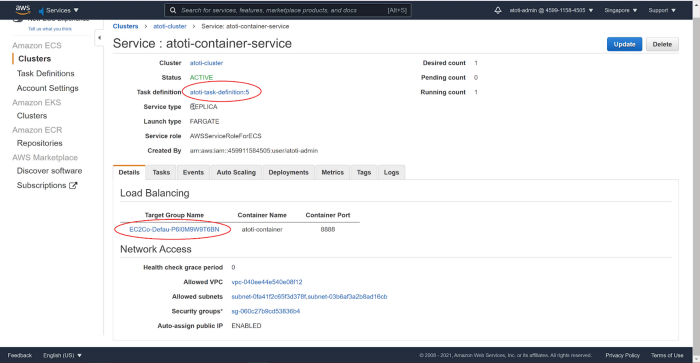
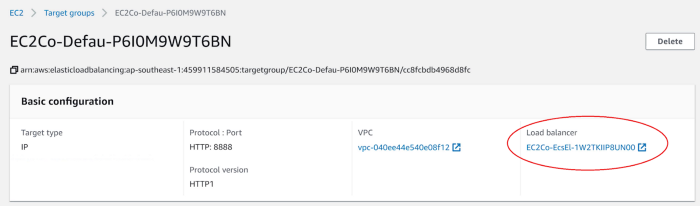
On the Service details page, we can see the revision used for the task definition, 5 in this case. Also, we see the target group created for the load balancing.
Modifying health check monitoring
Follow the target group link to the Target Group page.
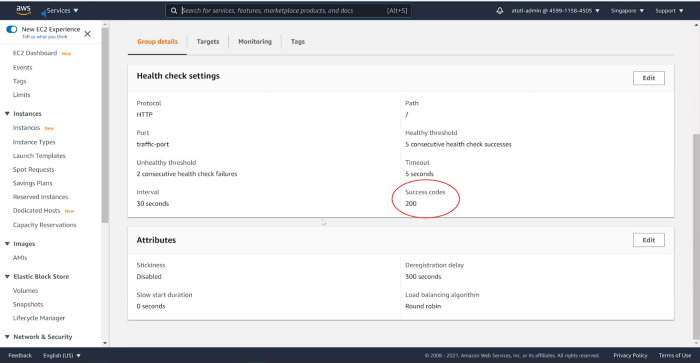
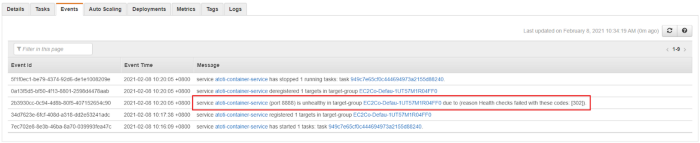
We see that the health check monitors only the success code 200. This may result in unhealthy service as shown below:
We need to edit the success code to include 302 for URL redirection and 202 for events invocation. You can modify to include more according to your application needs.
Click on the load balancer link shown below:
Accessing the application
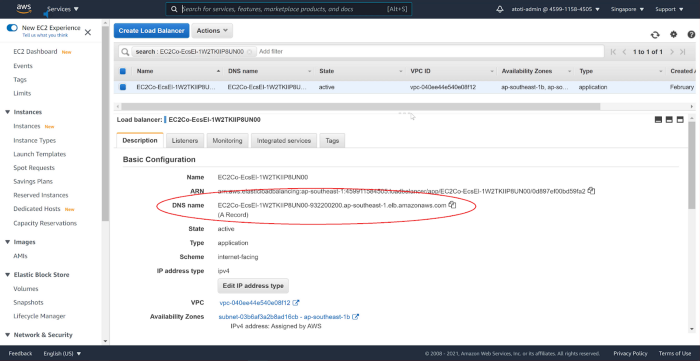
We can access the JupyterLab using the DNS name of the load balancer at port 8888, e.g. https://<dns name>:8888/lab.
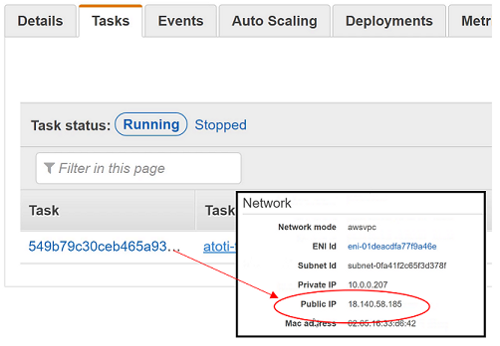
We can also access the application using the task’s public IP address. This can be accessed from the running task under the Service page.
We can also access the application using the task’s public IP address. This can be accessed from the running task under the Service page.
We are going to override the base URL for the Jupyter server such that it displays the DNS name of the load balancer instead. This is also important for Atoti as we want our users to be able to access the correct web application address:

Create new task revision
To do this, we will create a new revision of the task definition from the Service’s Tasks tab.
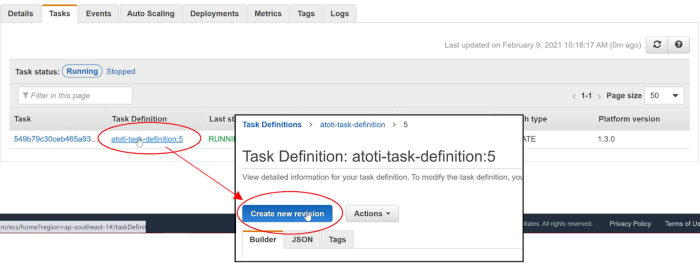
Note: You may also create a new revision from the Task Definitions menu.
Scroll down to the container definitions section to access our container.

Scroll to the Advanced container configuration > Environment > Environment variables section.
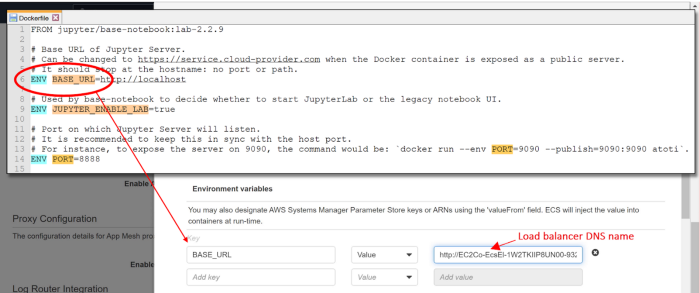
We override the value of the environment variable BASE_URL that was defined in the Atoti Dockerfile with the DNS name of the load balancer. Remember to prefix with “https://” (or “https://” if SSL is configured) since we are expecting a URL.
Finish up the update and we can see a new revision created.

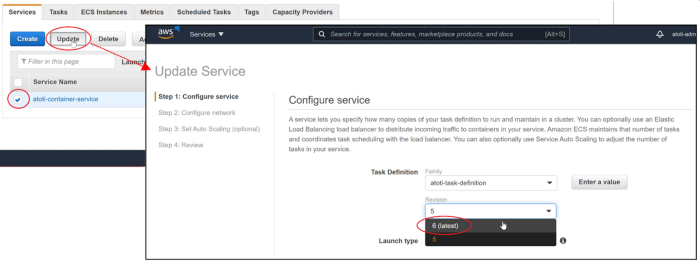
Updating Service
Going back to the Service tab under the cluster, select our service and click “Update”. Choose the version that we just created and complete the update.
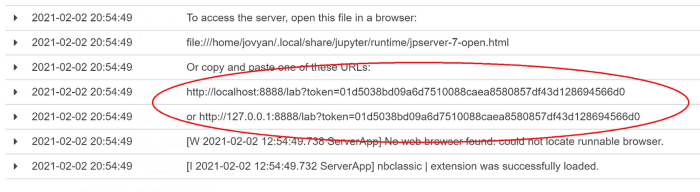
Once the task is running, we can access the logs under Services to retrieve the URL for the Jupyter server:
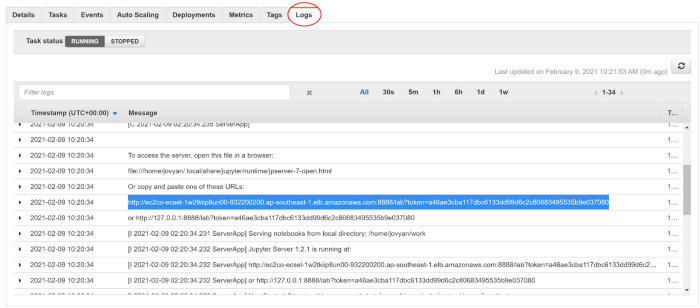
Voila! Our peers can now access the Atoti tutorial from our AWS instance at any time!
You might also be interested in…
As the BI web application is served via Jupyter proxy, we recommend that you customize the Atoti Dockerfile to implement alternative authentication for you and your peers to access the JupyerLab and the Atoti web application. To customize the Atoti Docker image, check out our previous article — A starter kit to dockerize a Business Intelligence project.
Also, read more about how you can store your Docker Image on Amazon Elastic Container Registry (ECR). You can easily deploy the Docker image from the AWS ECR using its image URI instead of the image from Docker Hub.