The latest version of Atoti is big, with many breaking changes. This upgrade guide will help you get your notebooks up and running
Introduction
The latest version of Atoti is packed with many changes, from performance upgrades to a new way to run simulations. To deliver this improved experience, we’ve changed the way we do certain things.
Version 0.6.0 introduces the concept of a flexible datastore. This will reduce the starting time on sessions made up of multiple tables. We’ve also standardized our naming conventions, moving away from “stores” to “tables” to better align with language used by SQL and other cloud based database systems.
On top of these changes, we’ve given the ability to duplicate a dashboard page, horizontally resize the filter popover, save filters, and have added tooltips on buttons in the title bar of widgets.
You can see a summary of all changes from this version upgrade in the changelog available at docs.atoto.io, and you can watch a video demonstrating a notebook upgrade on our youtube channel.
Upgrade your Atoti version
To upgrade your Atoti library, run
conda upgrade AtotiAlternatively, if you use pip to manage packages, you can instead run
pip install --upgrade AtotiThis will display the packages and version you are upgrading to. The Atoti version should be 0.6.0. Note, Atoti follows NEP 29 so it supports Python >= 3.7.1.
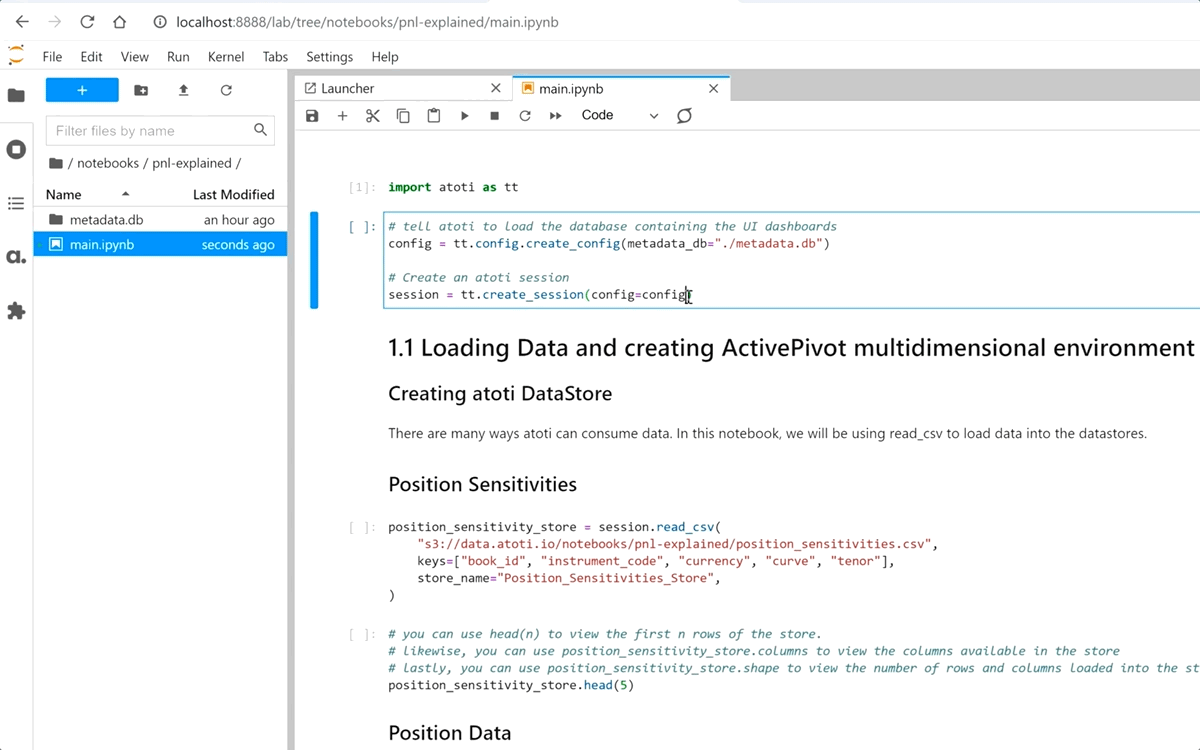
Once you’ve upgraded, you can begin your notebook migration. For this article, we’ll be using the PnL Explained notebook from the Atoti notebook gallery. You can find examples of this and other upgraded notebooks in our notebooks gallery on GitHub.
Update create_config
In previous versions of Atoti, we could customize configurations using the create_config function. In v0.6.0, create_config has been replaced by a plain Python Object that follows the structure of sessionConfig, which is similar to a JSON object.
We would often configure our sessions to read and persist dashboards in a metadata.db file. In v0.6.0, metadata_db has been renamed to user_content_storage. To address these two changes, you’ll need to do the following:
Firstly, replace the create_config function using the SessionConfig structure as a guide. In SessionConfig, there is a config parameter you can use to hold the location of your metadata folder. Point the config to the appropriate folder.
Secondly, use your folder explorer to rename the directory. The original metadata.mv.db file was previously hosted in a folder named “metadata.db”. Rename this folder to “content”, and rename the “metadata.mv.db” file to “content.mv.db”.
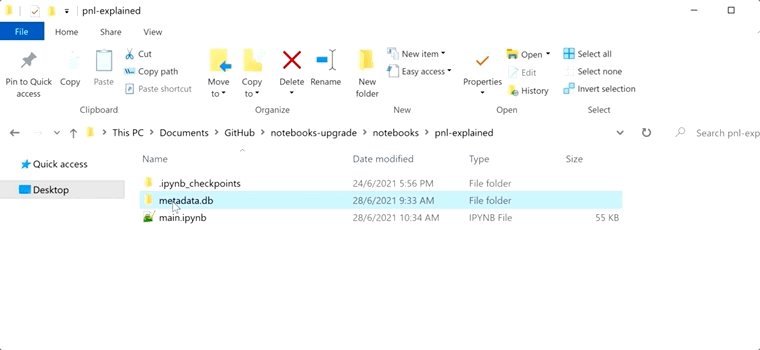
If it happens that the session is unable to find a content file, it will create a new one instead. If your project does not have a metadata folder, you can skip this step.
Loading Data
In v0.5.5, data was loaded into datastores before we could use them to create our cube.
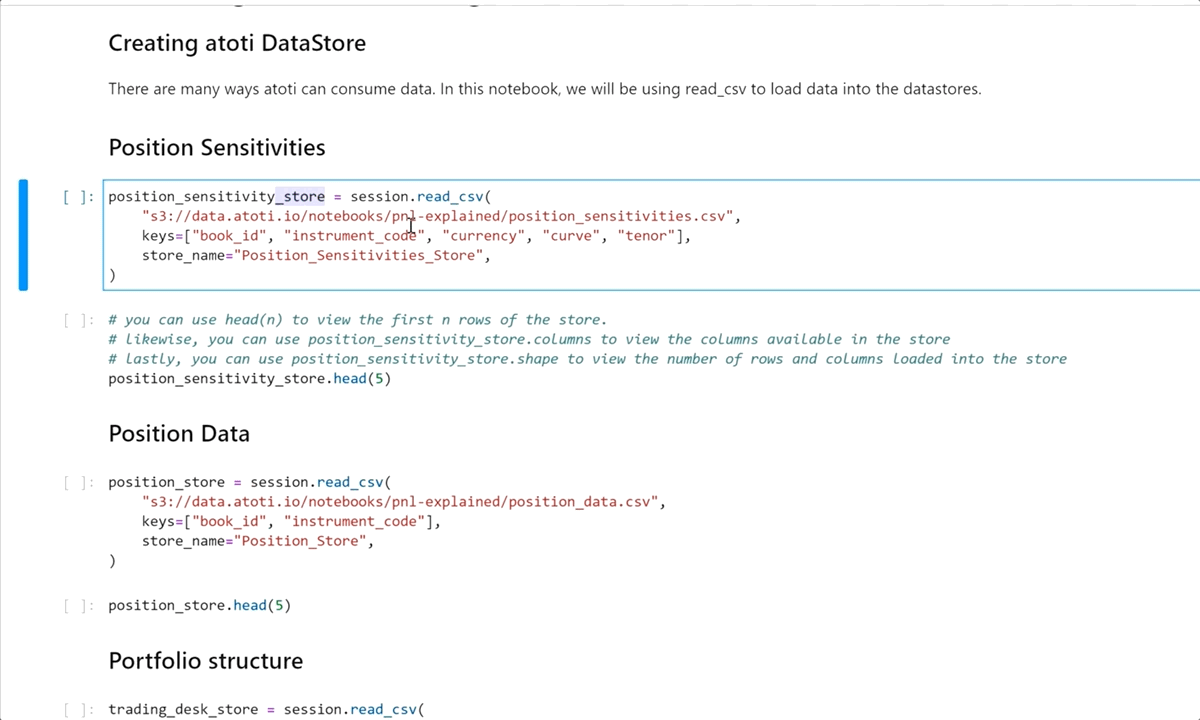
To better align with the language used in most cloud based databases, Atoti v0.6.0 has renamed stores to tables. This means any function previously using the string ‘store’ will have to be updated to ‘table’. You can simply replace all functions containing “_store” to “_table” and all instances of store_name to table_name.
Just note, if previous user defined names also included “_store” as a part of their naming convention then using find and replace will update these as well. There is no need to update user defined names; as a best practice, we recommend avoiding using “store” or “table” in table naming.
If you do change the names (perhaps to sanitize your naming convention, or due to running a find and replace), it will impact any query that previously used the table name, and those queries will need to be updated. We will cover this in Updating Visualizations and in the Accessing the WebApp section.
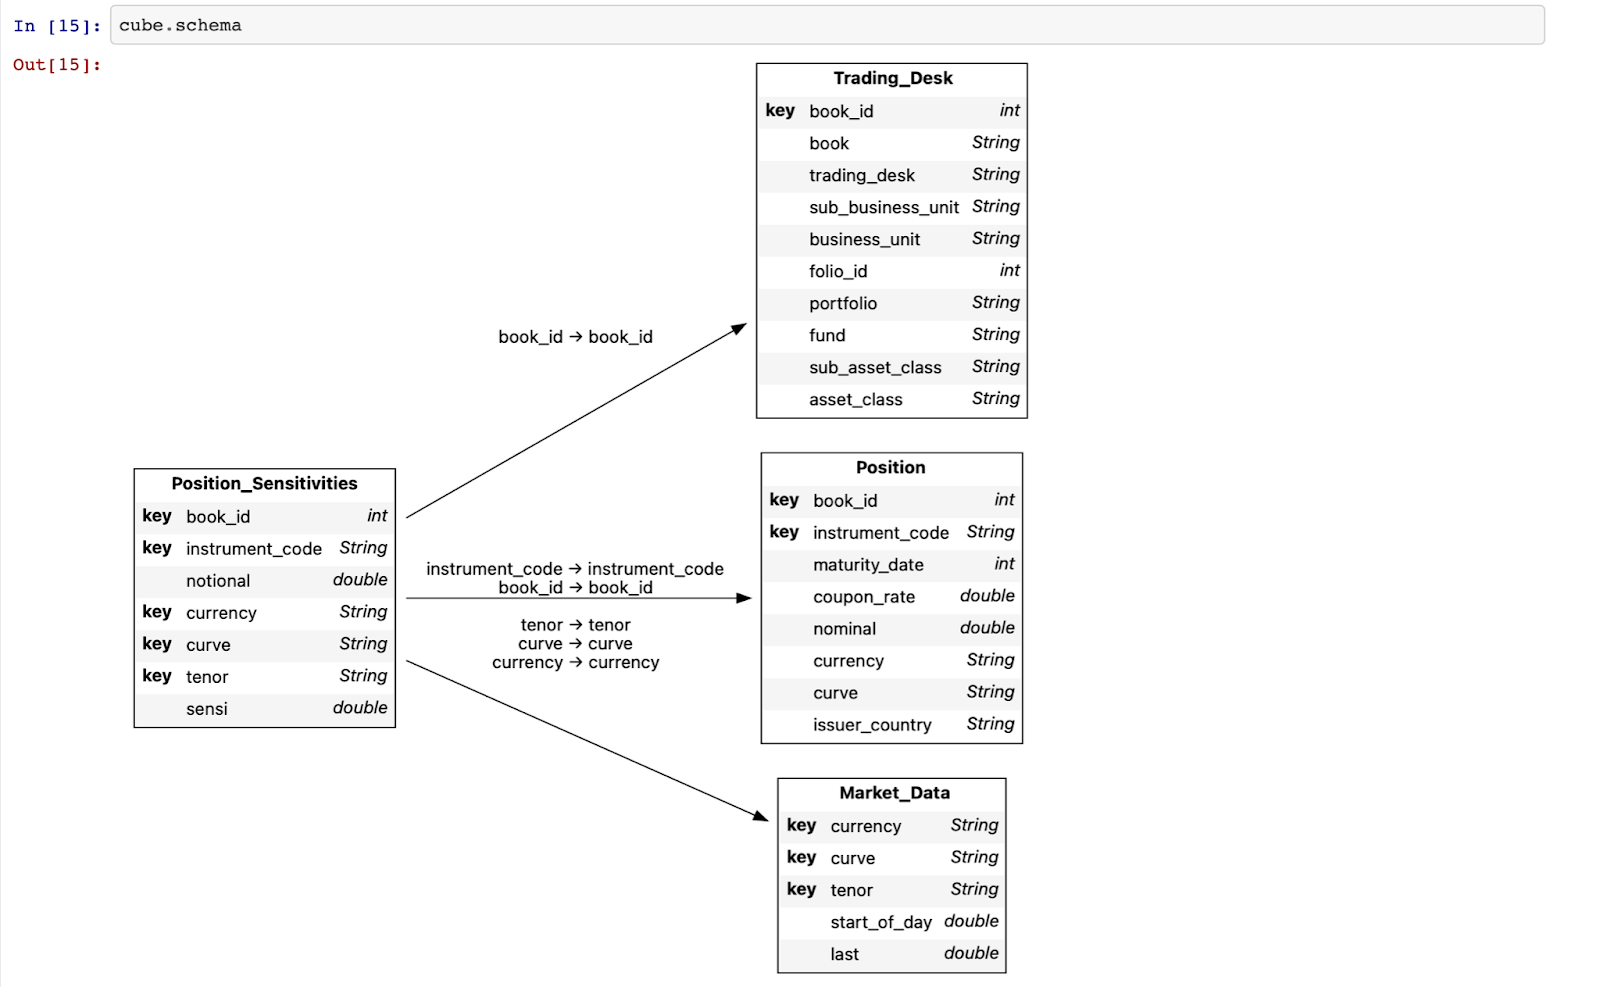
Once these have been replaced, you should be able to create your cube, with all the previous tables and relationships preserved. You can check this via the cube.schema command.
Alternatively, you can open your notebook in a text editor and run a find and replace. This will cover updating the cell metadata for each visualization as well. Just be mindful that, like above, all instances of “_store” will be replaced–including any names and paths. We recommend caution if using this trick.
While Atoti is optimized to handle a large volume of data while still providing fast results to queries, loading a large amount of data during the modeling phase means creating stores, joins, cubes, hierarchies, and measures all take more time. Previous versions of Atoti had an automated sampling mechanism for large data sets in order to keep the modeling phase as snappy as possible, and relied on invoking load_all_data to load all data into the cube.
However, data loaded via automated sampling may not have been appropriately demonstrative. In v0.6.0, the sampling mechanism has been removed and this control is now placed in the hands of the user. When working with large data sets, you can curate a subset of your data for data modeling. Once the data structures are finalized, you can load your remaining data. Given this, you can find and remove all instances of session.load_all_data.
Updating Visualizations
If you updated all instances of “_store” to “_table” in your JupyterLab instance or otherwise updated your table names, there are bound to be visualizations and dashboards that are now broken. This is because the act of find and replace does not cover the cell metadata for each visualization.
Here, we have two choices. One choice is to use the property inspector at the top right corner of your JupyterLab instance. In “Advanced Tools” select “Cell Metadata”. You can update all occurrence of the term “_store” to “_table”.
The other option is to open the notebook in a text editor as illustrated before.
Measure and Hierarchy Creations
How we access cube attributes has not changed in Atoti. And, as before, Atoti will continue to automatically create a .SUM and .MEAN measure for every numerical column of the base table, now including for long and integer type columns. Previously, INT and LONG columns did not have a .SUM or .MEAN measure automatically created. Now, unless the INT or LONG type column is set up as part of the key, it will also have .SUM and .MEAN measures created for it.
Also, as before, measures for reference tables will still need to have measures created manually.
In previous versions of Atoti, when creating additional measures we were able to assign the column of a datastore directly to the measure. This is no longer the case. In v0.6.0, update your measure creation to use the Atoti.value function to read the column into the measure.
To use these measures in a visualization, be sure to include the hierarchies involved in your table joins. Alternatively, you can define your measure to aggregate along these scopes.
There is no change to the way we manipulate hierarchies–we are still able to create multi-level hierarchies the same way as we did before.
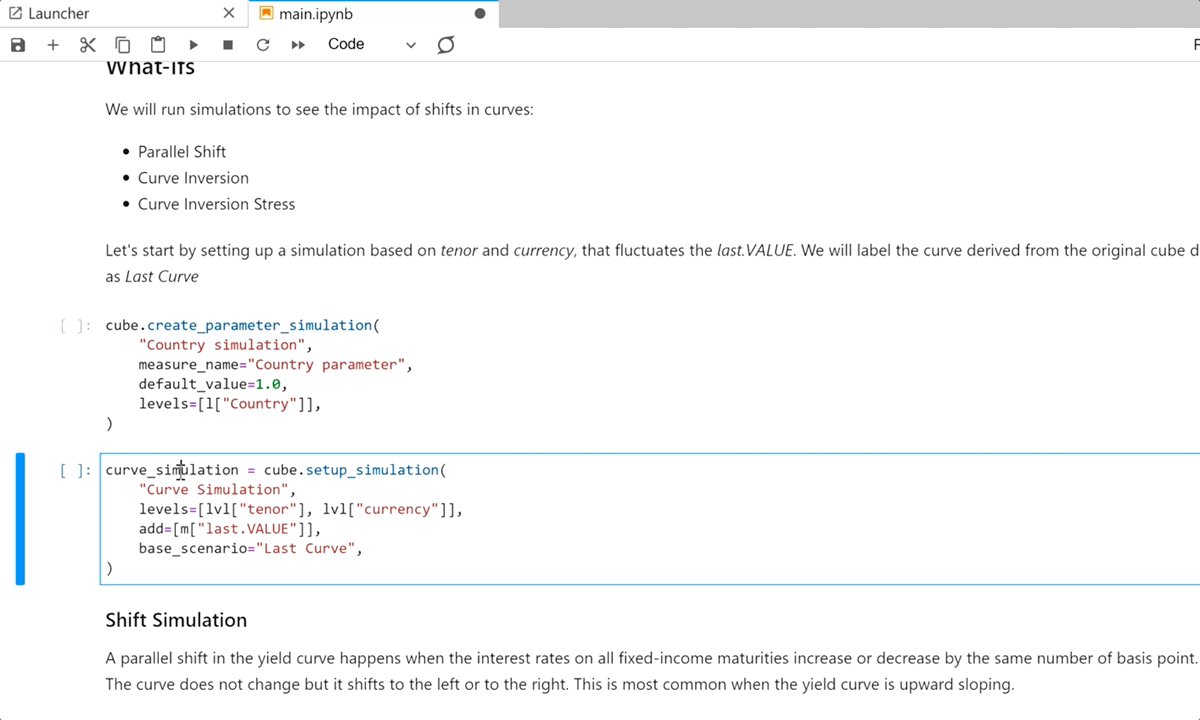
Parameter Simulations
In previous versions of Atoti, we could set up a function to create a measure simulation via the cube.setup_simulation function. This has been replaced by the cube.create_parameter_simulation function in v0.6.0.
The key difference to note is that cube.create_parameter_simulation creates a NEW measure that is used for the simulation. For more details on the difference between measure simulations and parameter simulations, check out our article on Parameter Simulations.
To update your measure simulation, first copy over your simulation name, levels and base_scenario parameters. Set up your default value to apply to any element outside your simulation–for example, if your previous measure simulation was adjusted by adding, then a default value of “0.0” is sensible to apply here.
To set up your scenario, give your scenario a name, then enter the parameters based on the levels specified previously. You can copy over your previous parameters for this part.
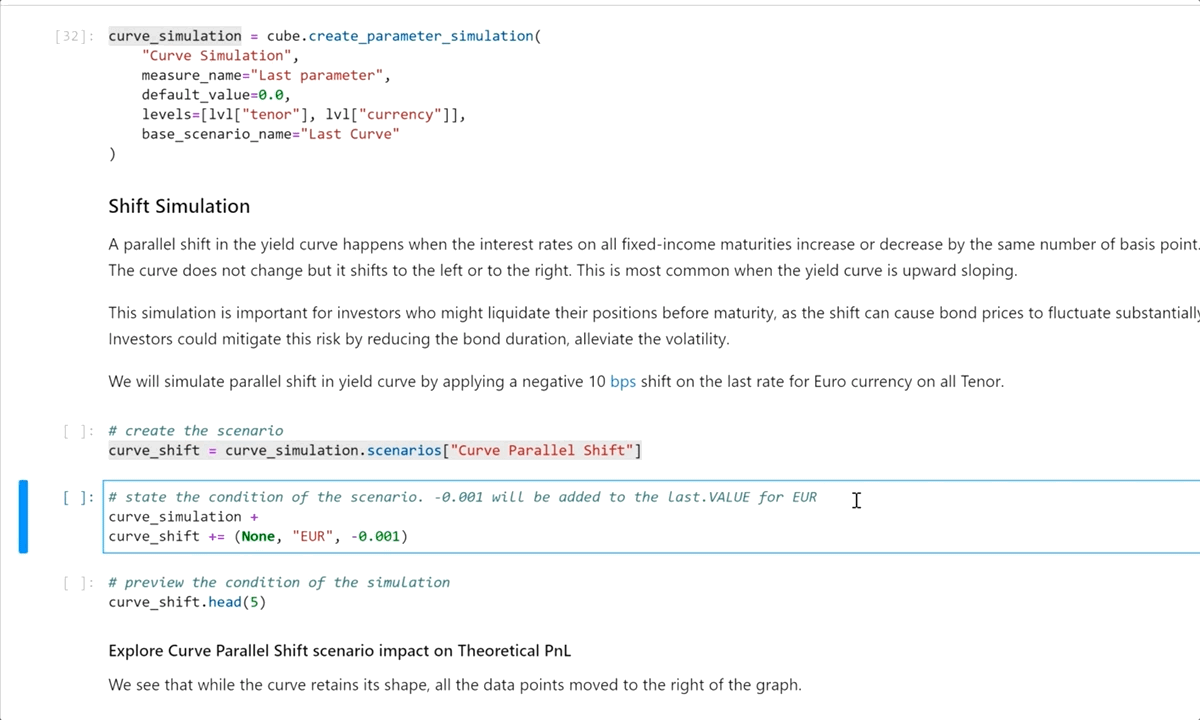
Similar to before, there may be visualizations that have broken due to this update. To fix this, we can again open our notebook in a text editor and replace measure simulation to the name of the newly updated simulations
Accessing the WebApp
Previously, we could access the URL of the web application using session.url. This function has been removed due to the deprecation of create_config. Instead, we will use the session.link() function to retrieve the URL of the web application. Simply update session.url to session.link() instead. Update the path parameter to point to the relevant dashboard.
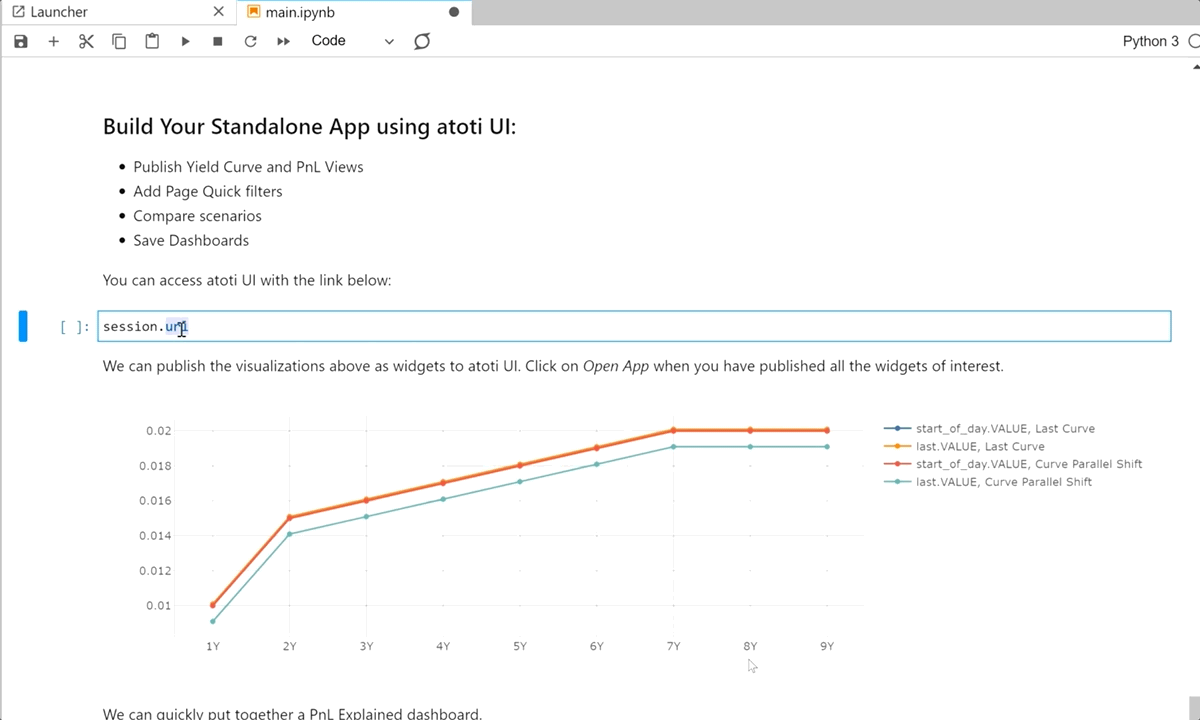
By running session.link(), we can access the web application.
If you updated metadata.mv.db to content.mv.db, you will have inherited the dashboards that were previously created, However, you may find that the created dashboards are now broken. This could be for 2 reasons:
- We renamed our tables, hence the dimension for the hierarchies have changed.
- The dimension name for our parameter simulation is different from the measure simulation.
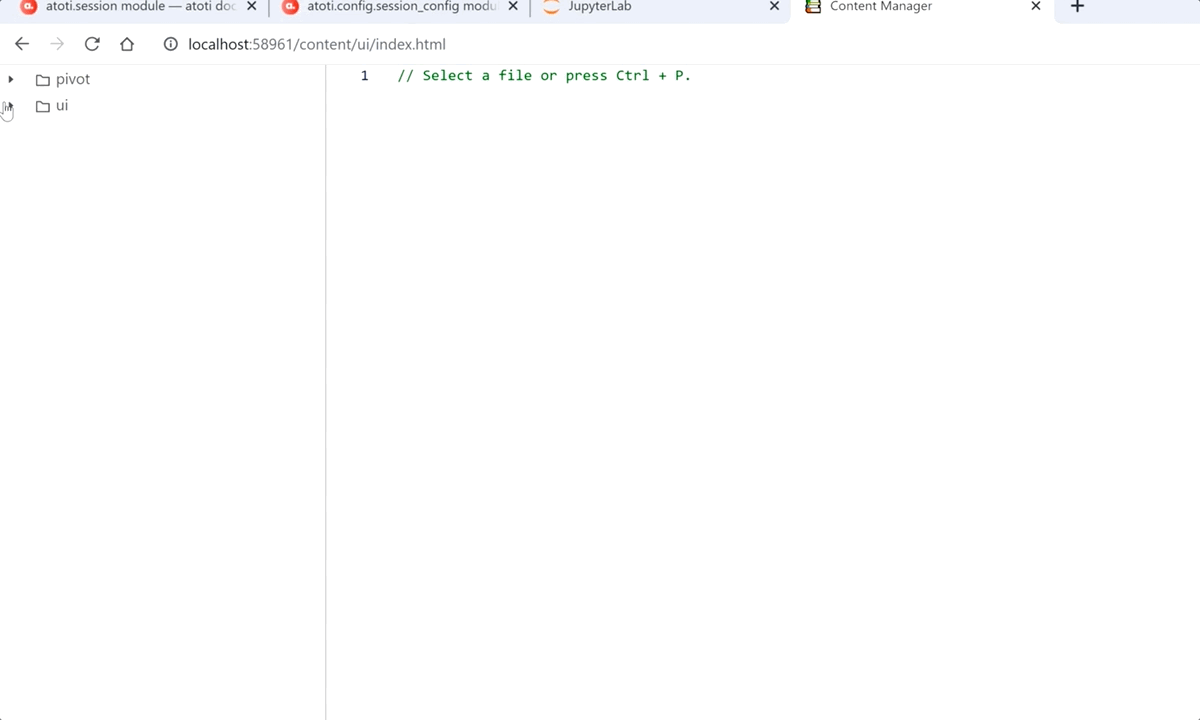
To fix these, access the Content Manager by updating to URL hostname : port / content. Expand the UI node to access the dashboards. The dashboard definitions can be found under the content nodes.
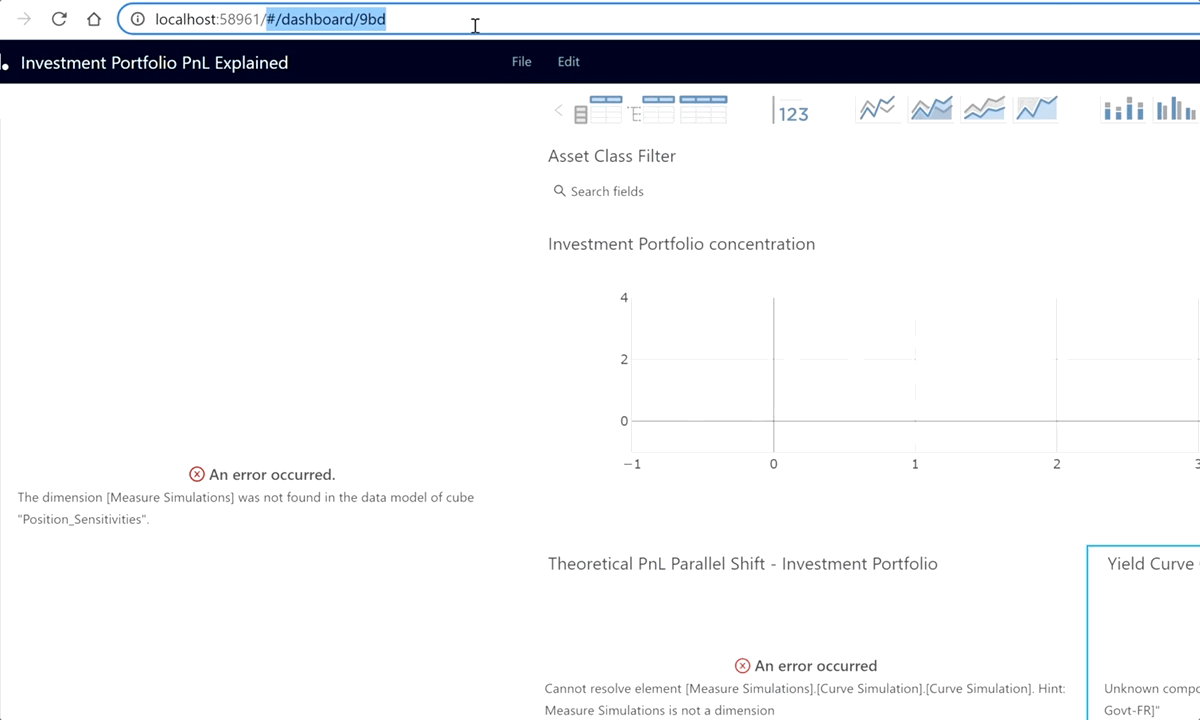
We can use the same strategy on the dashboard definition as before, by copying it to a text editor and doing a mass find and replace. Copy the updated definition back to the content manager and ctrl + S or cmd + S to save.
Following these steps should help you upgrade your notebooks. Remember, you can see a summary of all changes from this version upgrade in the changelog available at docs.atoti.io, or reach out to us with your upgrade questions via GitHub Discussion or GitHub. We hope this helps!