Are you considering hosting your data on the cloud?
One zettabytes is equivalent to a trillion gigabytes. The volume of data that will be created, captured and consumed worldwide is forecasted to reach 181 zettabytes by 2025. It’s no wonder that businesses are moving their data warehouses to the cloud to leverage its ability to scale on demand.
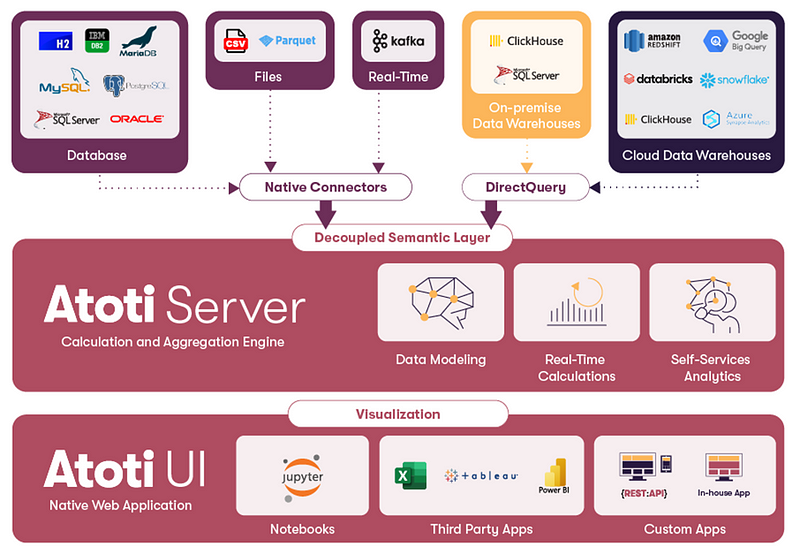
Here, we would like to introduce Atoti and why it’s amazing as a semantic layer on top of our cloud data warehouse:
- Atoti is a data analytics platform that uses in-memory database technology to perform complex calculations on-the-fly.
- It has a powerful semantic layer that can work with different data ecosystems. Regardless of the data source, we can have the same interactive multidimensional analytics without worrying about the data semantics each time.
- We can leverage the flexibility of the data warehouse to access current and historical data on demand.
This article explains how we can connect to different Cloud data warehouses. Let’s see how we can connect to Google BigQuery using the Atoti Python API.
Configuration on Google BigQuery
In order to be able to connect to BigQuery, we need to obtain the API Key in JSON format. Here’s what we recommend:
Step 1: Create a new role specifically for the DirectQuery Service Account to query the database.
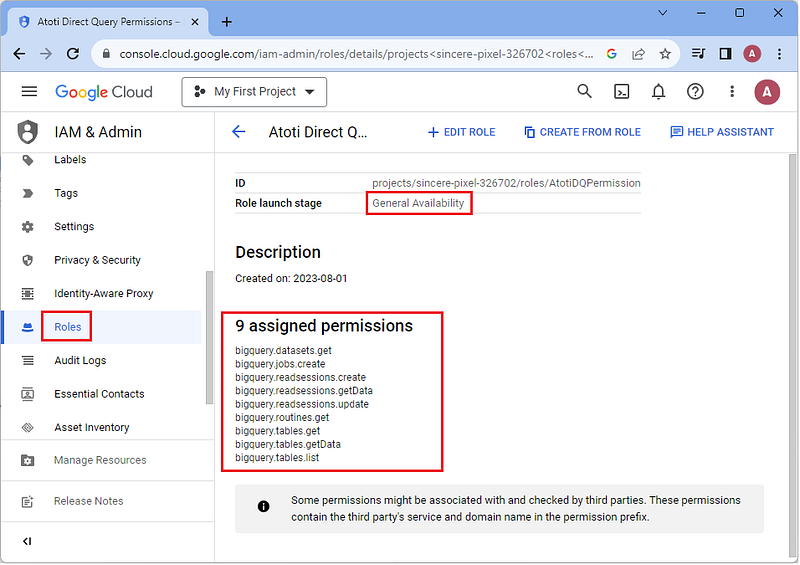
While you can set the “Role launch stage” to Alpha or Beta based on how well tested they are, we set it to General Availability.
Below are the minimum permissions that should be granted to the role:
- bigquery.datasets.get
- bigquery.jobs.create
- bigquery.readsessions.create
- bigquery.readsessions.getData
- bigquery.readsessions.update
- bigquery.routines.get
- bigquery.tables.get
- bigquery.tables.getData
- bigquery.tables.list
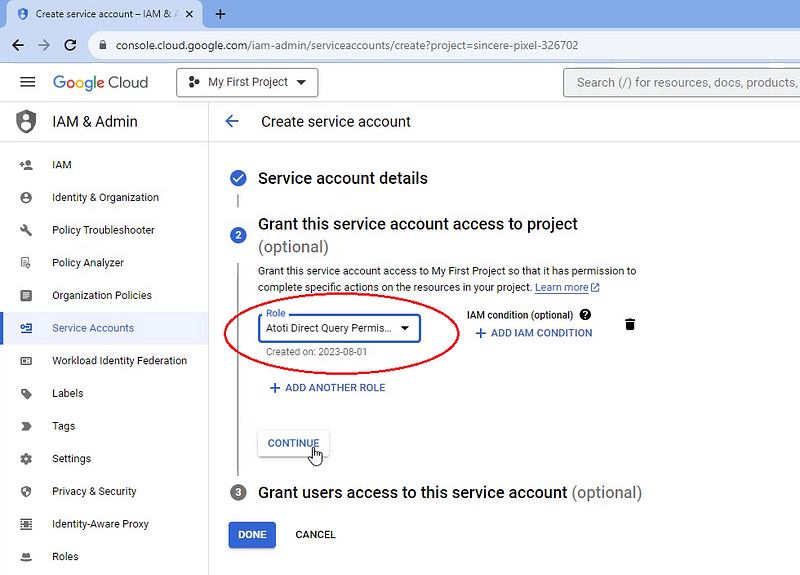
Step 2: Create a service account
We create a service account that will be used for the DirectQuery connection. Be sure to grant the service account the role that we have created in the previous step.
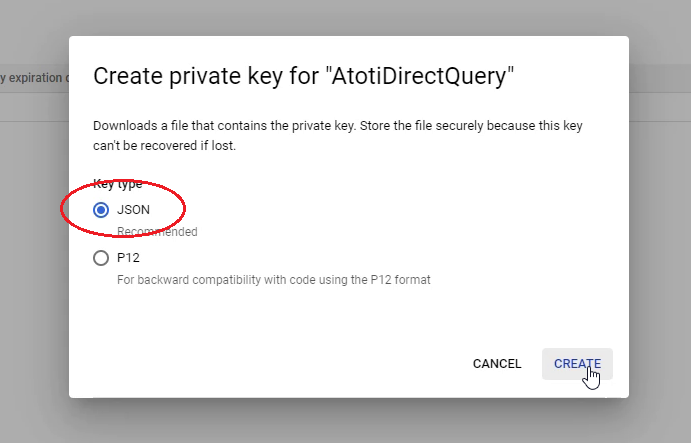
Step 3: Generate an API Key
From the Service Account that was created in the previous step, navigate to the “KEYS” tab and generate a new key.
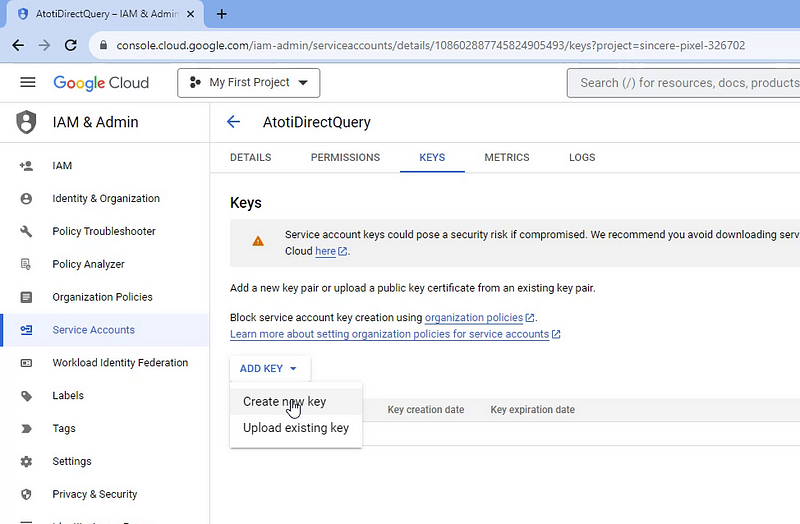
Remember to select “JSON” as the key format and save the downloaded key to server folder:
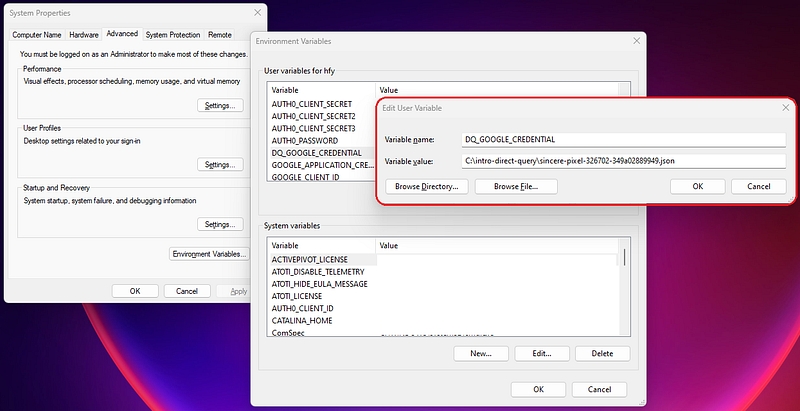
While we can use the path to the JSON file directly, we recommend storing the credentials and configurations in environment variables. By separating the credential configurations from the codes, the codebase can be shared without being worried about information leaks:
Connect Atoti to Google BigQuery
Now that we have configured our service account with the correct permissions, let’s see how we can connect to the database.
DirectQuery is an additional plugin that is used on top of the Atoti Python API. Therefore, we will have to import both Atoti library and the corresponding DirectQuery plugin for Google BigQuery:
import os

import atoti as tt
from atoti_directquery_bigquery import BigqueryConnectionInfo

session = tt.Session()

credential = os.environ["DQ_GOOGLE_CREDENTIAL"]
connection_info = BigqueryConnectionInfo(credential)

external_database = session.connect_to_external_database(connection_info)
We have to instantiate an Atoti session and we will use it to connect to the external database, which is our Google BigQuery instance in this example.
In the previous section, we have downloaded the JSON file containing the API Key for our service account. BigqueryConnectionInfo requires the path to the JSON file to connect to the Google BigQuery database. Either of the below code snippet works:
connection_info = BigqueryConnectionInfo("<PATH TO JSON>\<API KEY FILENAME>.json")Or
connection_info = BigqueryConnectionInfo(os.environ["DQ_GOOGLE_CREDENTIAL"])Test Database Connectivity
To test our connection to Google BigQuery, try listing out the tables available in the database:
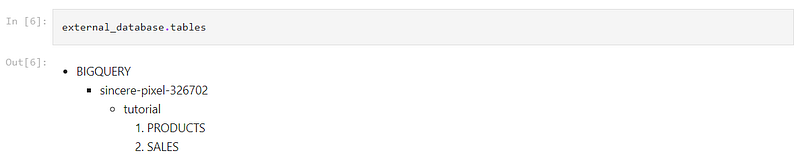
With a successful connection, we should be able to see the list of schemas and their tables. Otherwise, check that the service account has the correct permissions granted.
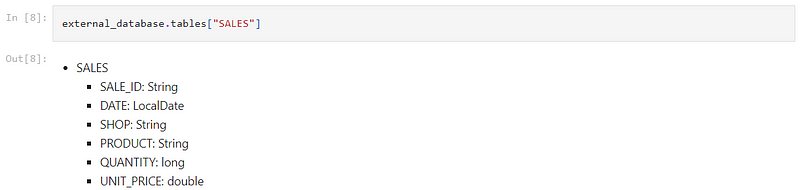
Evaluate Table from External Database
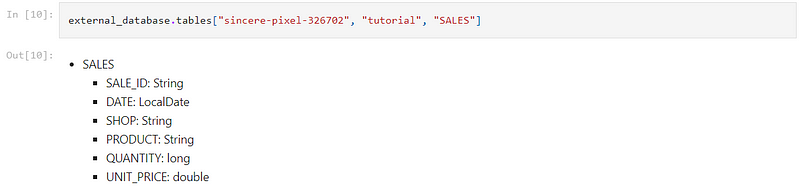
We can view the structure of a table by using the table name as a key to the external_database.tables list:
This works when the table name is unique. However, we can be more precise in identifying the table by providing the name of its database, schema and table in sequence:
Add external table to Atoti
We have seen how we can select a table from the external database. Using the session.add_external_table function, we can add the external table to Atoti:
sales_table = session.add_external_table(
    external_database.tables["<DB_NAME>", "<DB_SCHEMA>", "<TABLE_NAME>"],
)
In the above example, we assume the default values for the parameters of session.add_external_table. This means that we inherit the table name and all the columns from the external table.
Table Rename
We can name the table differently in Atoti using the table_name parameters.
sales_table = session.add_external_table(
    external_database.tables["sincere-pixel-326702", "tutorial", "SALES"],
    table_name="Atoti Sales"
)
In the cube, we see the Atoti Sales table instead of Sales.
Rename or Subselect Columns
We use the columns parameter to either:
- Select a subset of columns from the external database
- Rename column(s) from the external database into Atoti
sales_table = session.add_external_table(
external_database.tables["sincere-pixel-326702", "tutorial", "SALES"],
table_name="Atoti Sales",
columns={
"DATE": "DATE",
"PRODUCT": "PRODUCT_ID",
"QUANTITY": "QUANTITY",
"SALE_ID": "SALE_ID",
"UNIT_PRICE": "UNIT_PRICE",
},
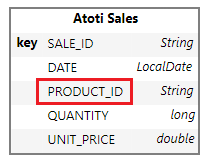
)We can see that our resulting table does not have the column “Shop.” In addition, the “PRODUCT” column has been renamed to “PRODUCT_ID,” which is aligned to the naming convention in the Product table.
Options for External Table
The session.add_external_table has an options parameter. We will pass it the object BigqueryTableOptions with which we can configure:
1 — Keys: keys of table that identifies the uniqueness of a row for insert and update operations. A newly inserted row will replace an existing row if the keys are the same.
sales_table = session.add_external_table(
    external_database.tables["sincere-pixel-326702", "tutorial", "SALES"],
    table_name="Atoti Sales",
    options=BigqueryTableOptions(
        keys=["SALE_ID"]
    ),
)
2 — Array conversion: An option to convert some values spread over multiple rows or columns into array columns.
For an example of array conversion, check out the notebook on Atoti DirectQuery with Snowflake: Vectorizing data from Cloud Data Warehouse.
3 — Clustering columns: The clustering columns splits up queries made by DirectQuery to the external database.

⚠️If a column has been renamed, the new name should be used for the parameters of BigqueryTableOptions instead of the original name.
Create Atoti Cube
We can add as many external tables as we want but they can only be from a single data warehouse connection. Once we have added the tables, we can perform the usual table joins and cube creation.
products_table = session.add_external_table(
external_database.tables[db_name, db_schema, "PRODUCTS"],
table_name="Atoti Product",
options=BigqueryTableOptions(keys=["PRODUCT_ID"]),
)
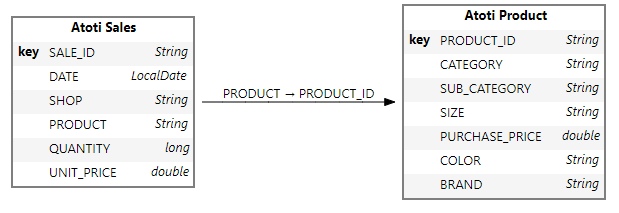
sales_table.join(products_table, sales_table["PRODUCT"] == products_table["PRODUCT_ID"])
cube = session.create_cube(sales_table)
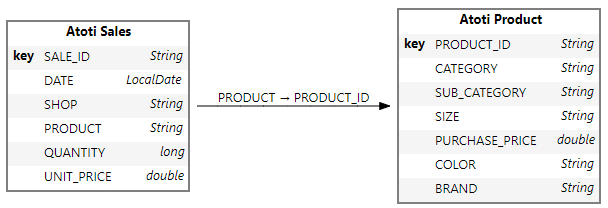
In the few lines of code, we have created a cube that’s connected to the database in Google BigQuery. With this, we can start our exploration!
Going Beyond
Check out this example on the Atoti Notebook Gallery. It gives an introduction to DirectQuery and demonstrates how we can connect from Atoti to Google BigQuery.
However, there’s more to DirectQuery than just that, such as effective memory caching with Aggregate Provider and scalability with horizontal distribution.
Get the evaluation license for the Python API and give DirectQuery a try! Alternatively, reach out to ActiveViam for more information.